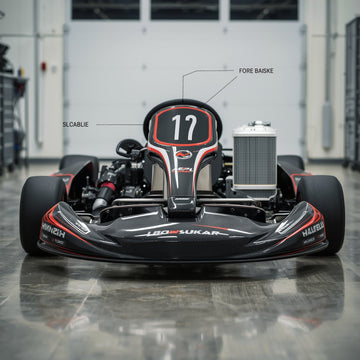
The go-kart axle is the backbone of your kart's rear wheel assembly, transferring power from the engine to the wheels and handling the stress of acceleration, braking, and cornering. When your axle becomes worn, bent, or damaged, it can compromise performance and safety. This guide walks you through replacing your go-kart axle with the right tools and techniques.
Essential Tools and Materials
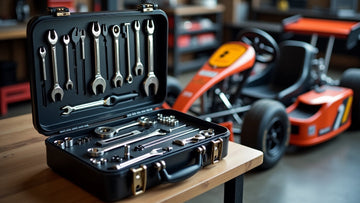
Before starting your axle replacement, gather these necessary tools and materials:
Required Tools:
-
Socket wrench set
-
Standard wrenches (10mm, 13mm, 17mm)
-
Axle puller or bearing puller
-
Hammer (dead blow preferred)
-
Safety goggles
-
Work gloves
-
Jack or kart stand
Materials Needed:
-
Replacement axle (specific to your kart model)
-
New bearings (if replacing)
-
Grease or bearing lubricant
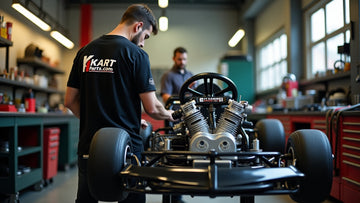
You can find quality go-kart parts and karting tools at specialized suppliers like Kartparts.com, which offers competitive prices on go-kart components and go-kart accessories for racing enthusiasts.
Safety Precautions
Safety must be your top priority when working on go-kart performance parts:
-
Disconnect the power source: Remove the spark plug wire or disconnect the battery to prevent accidental engine starts
-
Wear protective gear: Use safety goggles to shield your eyes from debris and work gloves to protect your hands from sharp edges
-
Secure the kart: Ensure your kart is stable on level ground and won't roll during the replacement process
-
Work in good lighting: Proper visibility prevents mistakes and injuries
-
Consult professionals: If you're unsure about any step, seek help from experienced mechanics or kart shops
Step-by-Step Replacement Instructions
Step 1: Prepare the Kart
Position your go-kart on a level surface with adequate lighting. Remove the seat if necessary for better access to the axle area. Clean the work area to prevent dirt from contaminating components during reassembly.
Disconnect the brake system if your kart uses a go-kart brake kit or go go-kart hydraulic brake kit. This typically involves removing brake lines or cables connected to the axle assembly.
Step 2: Remove Go Kart Wheels and Tires
Begin by loosening the wheel nuts while the kart is still on the ground to keep the axle from spinning. Once loosened, lift the rear of the kart and carefully remove the go kart wheels and tires.
Store them safely to avoid any damage. If you are looking for replacement go kart wheels and tires, make sure to note the current specifications for easy reference when purchasing new ones.
Step 3: Disconnect Drive Components
Remove the chain connecting the engine to the axle sprocket. Clean and inspect the chain for wear while it's removed. If replacement is needed, consult go-kart parts suppliers for compatible options.
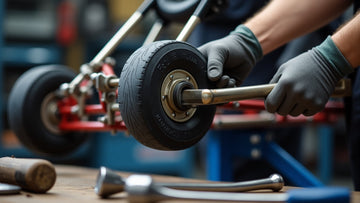
Next, remove the rear sprocket from the axle. Most kart sprockets use a keyway system or set screws for attachment. Keep track of spacers and washers for proper reassembly.
Step 4: Loosen the Axle
Locate the axle bearings on both sides of the kart chassis. These typically mount in pillow blocks or bearing hangers secured with bolts.
Remove the bearing mounting bolts carefully, supporting the axle weight as you work. Some bearings may be pressed into the chassis, requiring an axle puller for removal.
For stubborn bearings, apply penetrating oil and allow time for penetration before attempting removal. Excessive force can damage the chassis or bearing mounts.
Step 5: Remove the Old Axle
With bearings loosened or removed, carefully slide the axle out of the chassis. The axle may be heavy, so have an assistant help if needed.
Inspect the removed axle for damage patterns. Excessive wear, cracks, or bent sections indicate the cause of failure. This information helps prevent similar issues with the new axle.
Clean the bearing mounting areas thoroughly using degreaser and a wire brush. Remove all old grease, dirt, and debris before installing the new axle.
Step 6: Install the New Axle
Compare the new axle with the old one to verify the correct length and diameter. Check that keyways align properly with your go-kart sprocket kit.
Apply a thin layer of high-temperature grease to the axle where it contacts the bearings. This reduces friction and extends bearing life.
Carefully slide the new axle into position, ensuring it centers properly in the chassis. Install new bearings if the old ones show signs of wear.
Step 7: Secure the Axle
Reinstall bearing mounting bolts, tightening them to manufacturer specifications. Use a thread locker on bolt threads to prevent loosening during operation.
Check that the axle rotates freely without binding or excessive play. Any resistance indicates misalignment or over-tightening.
Step 8: Reinstall Drive Components
Mount the rear sprocket on the new axle, ensuring proper keyway engagement. Tighten sprocket bolts to specification using a torque wrench.
Reinstall the drive chain, adjusting tension according to your kart's specifications. Proper chain tension prevents premature wear and ensures reliable power transfer.
Step 9: Reconnect the Brake System
If your kart uses disc brakes, reinstall the brake rotor and caliper assembly. Check that brake pads have adequate thickness remaining.
For karts with band brakes, ensure the brake band aligns properly with the drum surface. Adjust cable tension for proper brake engagement.
Step 10: Final Assembly
Reinstall go-kart wheels and tires, tightening lug nuts to the proper torque specification. Use a star pattern when tightening to ensure even pressure distribution.
Lower the kart and perform final checks. Verify that all bolts are tight and no tools remain in the work area.
Troubleshooting Common Issues
-
Axle won't budge: Apply more penetrating oil and use a larger puller. Sometimes, gentle heating with a hair dryer can help expand the metal for easier removal.
-
New axle doesn't fit: Verify you have the correct replacement part. Measure the old axle diameter and length to confirm compatibility.
-
Bearing problems: If bearings are damaged during removal, you'll need replacements. This is common with older karts and should be expected.
-
Alignment issues: After installation, check that both go-kart wheels spin freely and track straight. Misalignment can cause premature wear and handling problems.
Professional Maintenance Matters
Replacing your go-kart axle may seem intimidating, but with the right tools, careful preparation, and quality parts, the process becomes much more manageable. A well-installed axle restores performance, improves handling, and ensures safety on the track or during recreational rides. Regular maintenance and timely replacements will also extend the lifespan of your kart, saving you from costly repairs down the road.
For everything from replacement axles and bearings to sprockets, clutches, brake kits, and specialized karting tools, Kartparts.com is a trusted one-stop shop for racers and hobbyists alike. With decades of experience supplying the karting community, we offer competitive pricing, fast shipping, and expert support to help you find exactly what your kart needs. Whether you’re upgrading performance parts, stocking up on maintenance essentials, or looking for hard-to-find components, Kartparts.com has you covered.
Explore quality go-kart parts and accessories today at Kartparts.com and get back on track with confidence.


